Monday, December 26, 2011

Wrist warmers are finished. . .next sweater decided.


These were a quick knit! I finished them just a few minutes ago and am wearing them now as I type up this post. I think that they will be plenty warm for work and I love the color. They are a little snug around my fingers so I hope that they don't interfere too much with my typing.

Now I have to find another project to keep me busy for a few days as I don't have the money to buy the yarn for my next sweater.

My next sweater comes from the newly released book by Connie Chang Chinchio, Textured Stitches. This book is stuffed full of wonderful patterns which are beautifully photographed and well illustrated. It was hard to choose, but my choice for the first sweater from this book is the Raindrop Cardigan.

This open, buttonless jacket style sweater is simple and elegant. The front is plain stocking stitch with ribbed collar. But the best part of the sweater is the back panel. The "bud stitch" on the back is striking and resembles a cross between a pussy willow and the eye on a peacock feather. I think that I am going to try to knit this sweater in a silk blend. I'm going to have a hard time waiting to order the yarn. Oh well, I will just have to get a couple of quick stash busters made.

Happy knitting!

Sunday, December 25, 2011

Sweater finished! On to next project.

Merry Christmas!!!

I finished my Chocolate Diamond sweater earlier in the week and as promised in my last post, I wore it to work one day and an open house for Maternity Homes of Fox Valley later that evening. I also wore it to my father's house for our family Christmas celebrations. Unfortunately, we have been getting some unseasonably warm weather this December, so the sweater didn't stay on too long. It certainly is a WARM sweater.

It was fun to wear it to the event for MHFV. Some of the other attendees had seen me working on the sweater and were appreciative of the finished results. It is always nice to have people pay attention.

I have been working on a new project the last couple of days. A pair of wrist warmers for work. My desk sits next to a window in a  year old building and the cold air rushes down off the window and across the desk. Wrist warmers will go a long way to making my hands stay warm. I am just winging the pattern as I just wanted to get started. After making a quick sample with yarn to get my gauge. I am just knitting up a plain stocking stitch with ribbed top and bottom.

I am using Washable Ewe yarn from Red Heart (Coats and Clark). It is a 100% super wash wool in a bright pink colorway called "icing". I actually think "bubblegum" when I see the color.

This wool has a sheen and feels slick when running through my fingers. It took awhile to adjust to the slipperiness of the yarn after working with the Wool of the Andes bulky that I used for my Chocolate Diamonds sweater.  I actually had to wrap it around my pinky finger three times before I could control the yarn.

I am going to work a peasant thumb as I did with my Convertible Mittens. This time, however, I did not make quite as wide an opening as I did with the Convertible Mittens so I should not have to do the emergency surgery with the Kitchener stitch.  As you can see from the picture, I have make pretty good progress and am on the ribbing on the wrist. I am planning to knit about 8 inches of ribbing so that when I wear 3/4 length sleeves it will keep my lower arms warm too.

I am also planning my next sweater. I have chosen an open jacket type sweater which I will fill you in on next time. I am looking at possible yarns -- I am thinking a silk/wool blend as I would like a smooth sheen to the fabric.

Happy knitting!!!!

Sunday, December 18, 2011

Off the Needles: Chocolate Diamonds Sweater


I have finally finished knitting all the pieces for my Chocolate Diamond Sweater. I am really happy with the way that it turned out. As you can see from the picture above, the diamond pattern really shows up. I got up early this morning so that I could block the sleeves before leaving for church. They were dry by the time we got home so then I pinned and blocked the back and front of the sweater. 

The picture above of the sleeves is a better representation of the color. I think that the morning light coming into my spare bedroom is much better to show color than the afternoon sun. As I noted in a previous post, I really like this Wool of the Andes Bulky by Knit Picks. I haven't found anything that I don't like about it and I am interested in working with the worsted weight variety.

I think that I am definitely getting sweater fever. I am annoying co-workers by staring at the sweaters they wear. I am always looking to see how different sweaters are designed and how a particular look was constructed.

In constructing this sweater, I used a loose, long-tail cast-on. I think that this is my favorite cast-on thus far. It you have never tried this method before, I think that KnittingHelp.com has one of the best videos for the method. It is easy, fast and has plenty of stretch for a ribbed bottom. If you have not tried this cast-on, I highly recommend it.

I am hoping that I can get the sweater put together in time to wear it to work one day this week before Christmas. I have a pale blue collared blouse that I can wear under it.

Happy Knitting!

Saturday, December 10, 2011

Frog Report


frogto unravel a knitted garment. Also frog stitch v., to intentionally rip out a seam, and n., an intentionally ripped seam.

The following items are no more:


Afghan  if you can't finish something in 10 years -- it isn't meant to be finished.
Lace Scarf after knitting 200 rows and only having 20 rows to show for it -- it isn't meant to be finished.


Frogging is hard to start and a relief to finish.

Happy knitting, er frogging!

Saturday, December 3, 2011

Plarn, the green yarn?


Over the past week, I spent some time in one of my favorite internet communities, Knitting Paradise, and learned something new. If you have never heard of Knitting Paradise or have never spent time there, it is a great way to get answers from more experienced knitters, share your latest finished project or just shoot the breeze with fellow knitters. It seems like I am always coming away with something useful, fun or interesting.

In this case, I learned about "plarn". Plarn is a portmanteau (or a blending of two words to make a new one) made of plastic and yarn. It is a great way to do what many plastic bags have printed directly on them: "Recycle, Reduce, Reuse"!

Making plarn is easy and there are a lot of good websites (see below) out there that show step by step how to make it, so I am not planning to reinvent the wheel here and shoot more plarn-making photos. But I wanted to share the project I am working on and a couple of lessons I have learned.

I decided that I wanted to try a shopping tote. (Not only is it useful, but I find it humorously redundant.) I chose to make the tote rather small as I wanted to try out the whole plarn thing without taking forever to complete something -- what a waste (humor alert) to throw out a bunch of good plarn if you don't finish the project. However, if I finish the tote, use it conscientiously, then I will soon deplete my never ending supply of shopping bags. . .

Plarn was easier for me to crochet than knit, I think it is because it does not give much and since I knit fairly tight, there was no give to slip the working needle into the plarn.

Making plarn is easy and monotonous. My preferred method quickly became: fold one bag, cut it up, and crochet it, go to the next bag, repeat.

Crocheting plarn is tiring on your hands. Again I will chalk this up to the lack of give/stretch. So it will be something that I pick up for an hour or so at a time when I am tired of working on a long term project like a sweater or quilt.

Check the bag before cutting it. Some bags are so thin that they have a tear in it which occurred  its prior use and your loop wont be a loop.

Since I do most of my shopping at one local grocery store, most all of my bags are white with red and green printing. You don't really see most of the red or green, but it shows up like speckles in the white, much like a tweed yarn.

I used a cut width of about 1 1/2 inches, but I certainly did not use a ruler, I just eyeballed it.

Happy knitting, um er, crocheting!

Good, step by step, how to make and use plarn websites:

http://www.etsy.com/blog/en/2010/how-tuesday-how-to-make-plarn-crochet-an-eco-friendly-tote-b/

http://craftingagreenworld.com/2008/06/19/yearn-worthy-yarn-plarn/

http://www.plasticbagcrafts.com/make-plarn/

http://diyfashion.about.com/od/diyfashion101/tp/Plarn.htm

http://www.crochetpatterncentral.com/directory/plarn_items.php

http://www.myrecycledbags.com/my-pattern-links/

http://debsgoinggreen.blogspot.com/2008/07/more-plarn-patterns.html

Friday, November 25, 2011

Making progress

I love vacation if for no other reason than I am able to make some real progress with my knitting. As you can see I have gotten quite a bit accomplished even with time out to prepare a thanksgiving dinner for eight. It has been especially enjoyable as my knitting sister has been staying at my house for the holiday weekend.

As I did with my textured sweater vest, I am knitting both the front and the back simultaneously. For me this proves to be the best option as I would hate to become bored with the pattern and never finish the front of the sweater after I complete the back. What a waste of good yarn.

But knitting the two sides together adds a small problem, if I get interrupted for any reason when I am between the two sides, I sometimes turn the work too soon and have more rows completed on one side versus the other. I solved this problem by connecting the two sides with stitch markers. I then treat this as if it is one piece switching the yarn ball in the middle.

The pattern is fairly easy to do. I say only fairly easy as it is fairly easy to get the count off and put a purl where a knit should be. So I have tried to get in the habit of checking my work after I have completed every row. When I find that I have made a mistake in the pattern, I mark the stitch with a stitch marker and use a crochet hook to fix it when I come to that stitch on the next pass.

I like the Wool of the Andes Bulky that I am using. The stitch definition is pretty good, and the yarn is not so thick that the sweater will be too hot when worn indoors. I wish my camera was better so that I could show what the true color is. But I work with the tools I have.

My knitting sister has been working on a pair of socks. At the present time, she is using Cascade 220 in Lime Heather to knit a pair of socks from The Big Book of Socks by Kathleen Taylor. She is on her 4th pair of adult socks out of this book. She likes this book because most of the sock patterns use the same size needle, so she has not had to go out and purchase a bunch of Addi turbos in various sizes. (Being on a limited budget is really hard on a rabid knitter.) I spent some time sharing the Silver's Sock Class website with her last night as she is interested in trying toe up socks.

Well, I am itching to get back to knitting, so Happy Knitting!

Sunday, November 20, 2011

Swatch for Chocolate Diamonds Pullover


I knitted and blocked the swatch for my next project last night. I really love it!!! I think that I like blocking swatches now. I never have done it before but I think that it really makes a difference. The Wool of the Andes Bulky yarn feels nice and soft and it has pretty good stitch definition. Of course, the stitch definition is improved by the blocking. I am really happy with the color that I selected--Hazelnut. I already have the first piece cast onto my size 9 Addi Turbos and I am ready to cast on the second piece. I am going to knit them simultaneously like I did my vest. So what am I doing on the computer?!

Happy Knitting!

Saturday, November 19, 2011

Textured Checkerboard Scarf


I have been working on a scarf for the daughter of a friend of mine all week and it is about half way done. I selected a rather inexpensive acrylic (70%) and alpaca (30%) blend called Andes Alpaca by Yarn Bee in the color Pearl. The acrylic makes it washable and the alpaca makes it fuzzy. I know it is fuzzy because I was knitting it on the train wearing black dress pants and the fuzz was all over me. The yarn also has a nice sheen too it. I am not a big fan of acrylic yarn, but this yarn is a little smoother and softer than the average acrylic.


I am working it up in a textured checkerboard pattern. It isn't anything that I had a pattern for, so I just winged it, however, I am sure I am not reinventing the wheel here!

Row 1 K5, P5, K5, P5, K5, P5, K5
Row 2 P5, K5, P5, K5, P5, K5, P5
repeat rows 1 and 2 three times
then

Row 1 P5, K5, P5, K5, P5, K5, P5
Row 2 K5, P5, K5, P5, K5, P5, K5
repeat rows 1 and 2 three times

Then continue repeating until the scarf is the length that you want. I am using a pair of US size 9 Addi Turbos.

For the average sized woman, 48 to 52 inches is about the right length with 60 inches as a very long scarf.

Happy Knitting!

Sunday, November 13, 2011

Ta Da! Finished!


I am quite happy with the way this one turned out! Is there a couple of things that I might change if I did same pattern again? Yes. But this is definitely a sweater that I will wear on a regular basis, and not just when I am lounging around the house. I will be wearing this to the office tomorrow!

Summary:

Pattern is Textured-Stitch Sweater Vest by Carol Covington in the book Vogue Knitting: Very Easy Knits ©1999 Butterwick Pattern Company.

Yarn is Paton's Classic Wool in Dark Grey Heather and Plum Heather 100% wool.

Knitted using Addi Turbo 60" circulars in US7 and US5 and I used a loose long tail cast on.

I knitted both the front and the back simultaneously which helped in getting the stripes even and the reduction for the armholes at the same place. This did make things a little confusing at times after I had started the V-neck since I had three balls of yarn going at the same time.

Having never done a vest with 1 X 1 ribbing on the arm openings, I ended up knitting the first one, trying it on and realizing that I Put in too many stitches as the ribbing stood straight out from the body of the sweater. Oh well, practice makes perfect! I knitted the second set with half the number of stitches at the top and the bottom of the arm hole and I think it turned out well.

If I had the ability to change anything, it would be knitting the rib at the bottom a little tighter as I did the neckline and arm holes. But I am not unhappy enough to do it over.

Best think is, I love the way the main sweater color highlights my hair!

Happy Knitting!

Friday, November 11, 2011

Convertible Mitten Update -- Finished!


I finally finished the convertible mittens. It took me awhile to get to the point where I wanted to take the time to finish them. If you remember from a previous post, I had some trouble with the thumbs. Of course, when I don't feel confident about what I am doing, I tend to put it off; but 35 degree temperatures in Chicago was the  sign that I needed to finish them for my friend's sake! 

You can see in the palm of the mitten where I tried to graph if using the Kitchener Stitch. I really like the way the ribbing around the finger opening looks. I only put a "texting" thumb on the right hand. I am not really happy about the way it made the thumb look weird and really over-sized. But from the picture, it makes it easy to text. It would especially be beneficial to iPhone users (or other smart phones) that are driven by touch. When using these phones, you must remove your gloves to use them.  I think that I will be making myself a pair of these really soon! 
Happy knitting!


Sunday, November 6, 2011

It's football Sunday, so I think I will block.


I could hear the football game and announcers in the background as I began working on my Textured Sweater Vest. They were talking about blocking and that is what I was planning to do. Of course, the football players version of blocking does not include pins and steam.

It's amazing how much knitted fabric stretches.
I have not had too much experience blocking before -- that is mostly because I used to knit mostly with man-made yarn and I haven't had good luck with blocking those knitted fabric. But the Patons Classic yarn that I am using will look best if properly blocked. So I went onto the internet to search for some information on blocking wool. One of the best sites I found was on Knitty.com. This article by Jessica Fenlon Thomas is quite comprehensive and gives the author's opinion on the best way to block just about any type of yarn there is, so I have made it a favorite for future use. 


After reading Thomas's advice, I grabbed the sweater pieces, pins, a measuring tape and my iron and  headed for the spare room. I stripped the blanket and comforter off the bed leaving only the sheets and the mattress pad. I measured and pinned according to the pattern dimensions. By rummaging around in my linen closet, I found a flat twin sheet and ran it though the rinse and spin cycles in my washing machine. That got it wet without sopping. I folded it in quarters and laid it over both pieces.

I have to tell you that at this point my heart was really beating. What if I screwed up!? The instructions said to sit the hot iron on top of the wet sheet to drive the steam into the fabric. My iron is a cordless iron, which was nice because I was quite a ways from an outlet, however, the iron cooled quickly on the damp sheet and required several trips to the base to reheat.

I set the iron around the edges first and worked into the center. The top layers of the sheet dried which made it easy to see where I had already been. After I had been all the way around the sheet, I removed it and left in all the pins. I will leave it pinned out until tomorrow evening. That way there will not be any question that it dried completely. Stay tuned to see what happens.

Happy Knitting!

Sunday, October 30, 2011

Sweater Vest continued

Work has kept me incredibly busy over the last couple of weeks. So busy that I did not get too much knitting in. It took me nearly all month to get the two pieces for the sweater vest done, but I completed the knitting tonight and will now bury all the loose ends and block the sweater. My plan is to get it done by next week so that I can wear it the following week to work.

The texture pattern is really lovely and I am happy with the way that it turned out. I did have some trouble working out the way the neckline was done and I ended up using a graph to figure it out. Math is great!

Happy Knitting!

Saturday, October 22, 2011

Animal Tracks - A good yarn: Knitters make sweaters for penguins after oil spill

Life sometimes gets in the way of knitting. I didn't even have time to blog last weekend, but a friend passed this story to me (THANKS SCOTT) and I had to share. This is so cute it should be against the law!

Animal Tracks - A good yarn: Knitters make sweaters for penguins after oil spill:

Sunday, October 9, 2011

Sweater Vest

Well, I spent the last week working on a new project. Yes, I know I have not finished the mittens, but I have a good excuse. My friend was not able to try them on so that I can check for proper placement of the texting thumb opening. Or at least that is the story to which I am sticking!

But I love my new project. It is a V-necked sweater vest which I found in Vogue Knitting: Very Easy Knits a "best of" book put out by Butterick Patterns in 1999. My pattern, Textured Vest" is just as the book states -- very easy. The 4 row pattern is easy: Knit row, Purl row, K1 P1 row, Purl row. The texture that is created resembles a waffle.

The pattern shows it in a solid color, but I am mixing it up a little. The main color is a lovely charcoal grey heather the stripes in a dark plum heather. There will be 3 plum colored stripes 2 narrow stripes flanking a wider stripe starting below the arm holes and going above half way up the v-neck. I have chosen a beautiful Classic Wool by Patons a 100% hand wash wool. It knits beautifully. The twist is perfect and it has a nice elastic feel to it when stretched.

Saturday, October 1, 2011

Convertible Mitten Update -- Thumbs Down


The convertible mitten project is languishing in a bag as other obligations (work) and passions (MHFV) have taken priority over knitting this week. Thankfully, I do have a long train commute out of the city everyday and was able to get a little bit of work done on the mitten thumb. It was, however, all for naught as I soon found out I made a huge miscalculation on the number of stitches that I needed to leave live for the thumb. By the time I had knitted half way up the thumb, I realized that you could have put 3 thumbs in the opening. Of course it looked ridiculous. So much for "winging it."

It is errors in judgement like this that make me appreciate website forums like Knitting Paradise. I was able to quickly get a suggestion from another knitter on how to correct this problem. I am getting lots of practice picking up stitches with dpns. I picked up a row of knitting as close to the original live stitches as possible and frogged down to that point. I then tinked back to the original live stitches.

My next step was to use the kitchener stitch to close up some of the stitches in the palm.  I have never used the kitchener stitch on any project, so I hit YouTube and watched a video by theknitwitch. The video was easy to follow and the repair job turned out better than I expected. I had a rather difficult time because the stitches were a bit stretched and they didn't smooth out really well. The lesson learned here is to use a waste yarn that is not bigger than the yarn in the project. I will obviously have to do the same thing to the second mitten as it has the exact same problem. At least I was not knitting the mitten thumbs two-at-a-time!

Happy Knitting!

Sunday, September 25, 2011

Planning the NEXT project.


OK, let's not get into my list of unfinished projects; I am merely doing research at this point. I haven't even purchased the yarn. . . yet.

I decided that I have a hard to fit body. My rear end is too big, I have no waist, and my arms are too short for the standard-sized sweater. I also prefer a neckline that is not too low and a sweater that is long enough to cover the aforementioned over-sized rear end. So I have given up trying to find a sweater pattern that already fits me and I have begun to research how to modify a sweater pattern myself with out botching it up (see previous post).

In my research, I have found a book that I thought I would pass on to others, should you, too, have a hard to fit body. The Twisted Sitters Knit Sweaters, A Knit-to-Fit Workshop by Lynne Vogel, is a sweater making class wrapped up in a paperback book complete with a "hand-out" of a "Fitter List" which you can use to record your knitting journey. For me, this would mean that I could go back and re-write my mistakes and do the pattern again, correctly.

Because the author and her "twisted sisters" dye and spin their own yarn, she advises the reader how to classify yarn using gauge, wraps per inch, and yards per pound etc. This makes it easier to select a substitute yarn for those patterns for which the suggested yarn has been discontinued or is outrageously expensive. On the other hand, you can use the information to rework the pattern to accept another gauge yarn -- something I have not always been too successful with in the past!

All in all, I found the book very useful to my cause and I can't wait to dive in and knit my next sweater to actually fit me. Happy reading! er, um knitting!

Saturday, September 24, 2011

Convertible mittens are almost done!


I need a long car ride/vacation so that I can get something done. I was sick last weekend and then all this week, I was so busy at work that I didn't have much time to work on any of the many projects that I have on needles. Neither did I get much work done on the Helping Hands quilt -- but that's for another post! But today I sat down and finished the body of the convertible mittens that I have been making for a friend.

Then as I told you in a previous post, I began using the idea of blogger Rebecca at ChemKnits to create convertible mittens from any pattern. I highly recommend this video if you are interested in trying to make your own convertible mitten. I got the opening made on both mittens and I have knitted the ribbing around the opening on one mitten.

For the ribbing around the opening, I stepped down the needle size from a US 6 to a US 4. I can't imagine getting a size 6 into the stitches. It was really hard to pick them up since I had used such a thick waste yarn.

Winging it has its advantages. I have watched many videos and read a lot of posts on Knitting Paradise.  I have taken a lot of ideas from many places. And  you learn by making mistakes, and I have been learning a lot! It has been fun.

One of the interesting things that I learned concerns picking up stitches. When you pick up the stitches before you open up the mitten, because of the way knitting stitches interlock, there will be one more stitch to pick up on one side then there is on the other. I am glad I saw that somewhere in my "travels" or I might have had an awful mess on my hands.

If I get any further tomorrow, I will post the results. Happy knitting!

Friday, September 16, 2011

Now I am really MAD . . . at myself!


Do you see my mistake? I was just happily knitting along the other night, watching a movie with my BFFs and not paying attention to what I was doing. It wasn't until the next day when I picked up my knitting and found my error. I messed up the braid on the last cross over on the left hand mitten. I was supposed to hold 3stitches in front, but it looks like I held 3 stitches in the back. So now I will have to tink back about 4 rows--on both mittens! Waaaaahhhhhh!

Sunday, September 11, 2011

Cabled Convertible Mitten


The cable begins
There is something about cables that just speaks to me. If you remember, my last socks were cabled, but that did not get the cabling out of my system. A friend asked me to make her a pair of convertible mittens a few weeks ago, and since it was finally time to start them, I thought about doing cables, but I couldn't find a pattern that I liked. I began looking at the convertible mitten patterns that were out there and it occurred to me that perhaps I could use any mitten pattern that I wanted and just use waste yarn to create the flap.

Fortunately for me, one of the knitting blogs that I follow, ChemKnits, put out a post on just the very idea that I had! In her video, she shows a regular mitten pattern on which she is using a waste yarn method to change to convertible. My plan is to take her idea one step further and add a convertible thumb for texting since I know my friend likes to text.

Here is one of the mittens in progress. I chose a plait instead of a two strand cable. I love the color of this Cascade 220 worsted weight -- it is called dark chocolate. Well, yeah, what else would you call it! The yarn has beautiful stitch definition with what is for me, the perfect amount of stretch in the fibers. It has a firm texture which holds up and does not leave spaces where the cables pull the stitches over.

I decided to knit the mitten from the fingertips to the cuff. Since I have done several socks lately, I realized the toe of a sock closely resembles the fingertip of a mitten. I haven't ever done a pair like that, but hey, why not. Of course, that would make it more difficult to work a mitten with a gusset thumb, so I will use the waste yarn again to work a peasant thumb.
I do have two lessons already learned. For the first, I forgot how a cable pulls the stitches in. That wouldn't be a problem normally because you wouldn't worry if the palm got pulled around a little, but the white waste yarn highlights the fact that the opening and the ribbing that will be knit along the edge will be visible from the back of the hand. So when I make another pair, I will make two more increases (four extra stitches) on the back/braid side of the mitten. This will give enough width across the back of the hand that the opening will not be pulled around.

The waste yarn
The second lesson learned is similar to the first. The mitten turned out pointier than than I care for because the cable is pulling it inward. I think that I would modify the figure 8 cast on and add four extra stitches at the tip so that the end is wider. This would also require fewer increase rows and that would give a rounder look to the top of the mitten.

Until next time, "Happy Knitting!"

Sunday, September 4, 2011

I think I like knitting socks!


I love the colors of my Meadow Socks! This was such a fun pair of socks to make just because I love doing cables. They look so complicated and are so easy to do. As I told you in my last post, the yarn maker, Classic Elite Yarns said that Liberty Wool had good stitch definition. I think that is very true here. Even with the color changes, the cables are very clear and are easy to see.


Again, I used Cat Bordhi's Sweet Tomato Heel. I think that this was my best attempt yet. Not one missed stitch and even with the clear definition of the stitches, the heel looks as smooth as a baby's bottom. And you know they would show up with a yarn like this.

Now on to my next project. . . convertible texting mittens.

Happy knitting!

Saturday, September 3, 2011

Helping Hands


Here is the center panel for the charity quilt for Maternity Homes of Fox Valley. I am quite pleased with the way it turned out. I think that I did a pretty good job of balancing the color and value of the hands as I arranged them. The hearts were an unexpected feature. Some of the hands that were drawn onto the Pellon Wonder Under Fusible Webbing were drawn on the glue side. You would think that it would not be an issue, however, that meant that the pencil marks ended up between the glue and the fabric. So for the two or 3 hands that were ironed onto light colored fabric, I could see the name written on the hand. So was born the heart idea. I then spread some more hearts around to balance out the look. I got the heart-in-hand block after all!

My plan is to do an irregular piano key boarder similar to the Heartfelt quilt that I finished a couple of weeks ago. I don't have any thing else that would be appropriate and it will bring all the colors out to the border. The second border will be white again and I may put more hands in it, but it will mostly depend upon what I have left over after creating the piano keys.

For the binding, I am going to make it striped from the hand dyed fabric. I need to remember to cut that before I start any hands for the border--I certainly don't want to get done and not know what I will use for binding. I will have no choice but to purchase fabric for the back. I don't have enough hand dyed to make the back so I will buy a white muslin. Hancock's of Paducah has a bleached muslin in a 108 inch width. That will be wide enough so that there will not have to be a seam in the back.

Happy quilting!

Sunday, August 28, 2011

Don't needle prisoners over this yarn via Taranaki Daily News


Dateline New Zealand

Don't needle prisoners over this yarn - oddstuff | Stuff.co.nz:


Needles might be a taboo topic in most jails, but not at the New Plymouth prison.
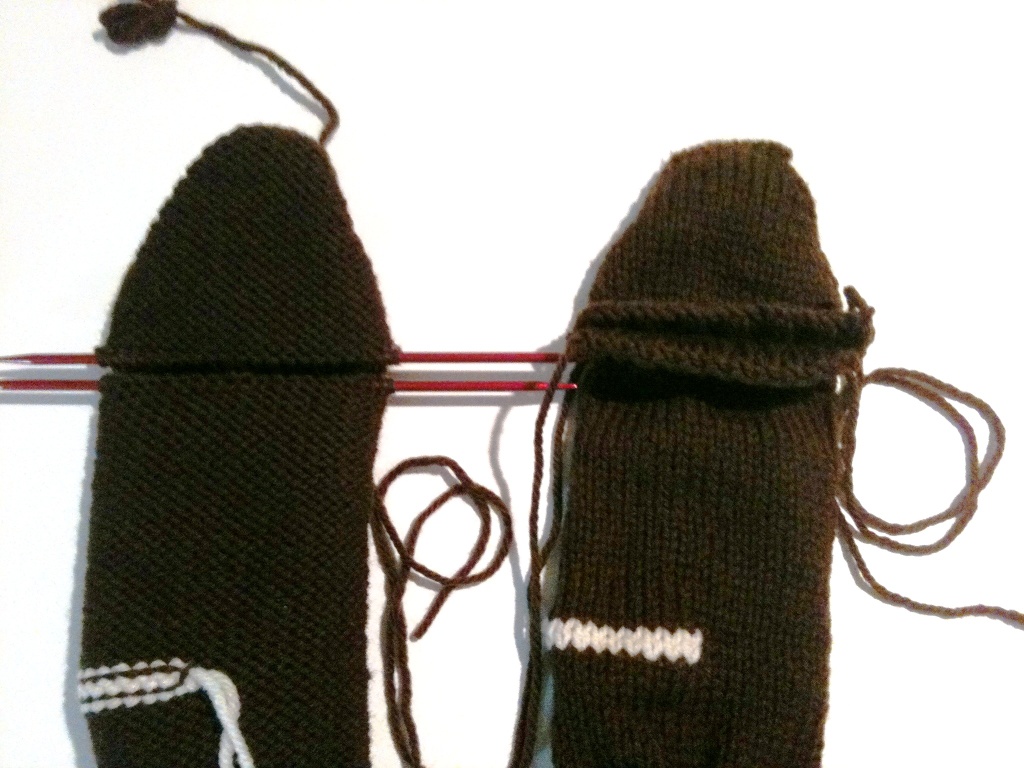
For the last six months the prison's harmony unit has taken up working with yarn and needles to knit beanies and other items.
To everyone's surprise the initiative has been a success with up to 16 prisoners taking part.
The items they created, under the guidance of Prisoners' Aid and Rehabilitation Society Taranaki president Barbara Sarjeant, were yesterday donated to Women's Refuge.
Acting prison manager Ngaire Knowles said the idea came out of a brain-storming session and she was pleased it had been embraced.
"I think they have appreciated they have learnt a new skill that they can take back to their families."
Prisoners in the unit were able to knit during unlock hours and some were even allowed to do it in their cells, Ms Knowles said.
One member of the group, in his 50s, said he was stunned by the results.
"It is quite productive," the prisoner, who could not be identified, told the Taranaki Daily News.
"It is not a guy thing. It is not something that many blokes would do on the outside."
He was taught to knit by his mother when he was nine and off school but he was not sure it would catch on in jail.
"No, I didn't. I still laugh at how well it's gone."
Being involved in the group had helped prisoners bond and develop skills besides their needle work.
"We all get on really well, knitting has played a big part in that. It helps others to communicate, whereas otherwise they might not have," he said.
He said the group discussed all of the usual topics when they were together.
"Fishing, hunting and cars. We are real blokes but we knit."
Mrs Sarjeant said she was sceptical about the idea when it was first mooted.
"When it was first broached to me six months ago, my reaction was you have got to be joking," she said.
The group was now thriving and Mrs Sarjeant said she couldn't be more pleased. "I'm delighted, I really am. This is good stuff," she said showing off items they had made.
Women's Refuge manager Janice Jessiman was impressed with the group's work. "I think it is great. They are giving something positive back to a community that they may have hurt in the past."

Meadow Socks


After two four-day weekends of traveling and getting a pair of socks done each weekend, it was a bit of a letdown when I was unable to finish my Meadow Socks. As you can see, I have not even gotten to the heel turn.

I told you in a previous post that I wanted to put cables in these socks, as this yarn promised good stitch definition. I decided on a double, mirrored cable that runs up the top of the foot and up the front of the leg. The sock uses a toe with a figure 8 cast-on. I found a wonderful online pictorial lesson called Silver's Sock Class for this cast-on. It was very easy to do and tied with Cat Bordhi's Sweet Tomato Heel, who needs a pattern?!

Liberty Wool by Classic Elite Yarns, is a pleasure to knit. I think I have found a new favorite! It is soft and very smooth. I have not had much problem with the plies splitting and the stitches are easy to see and pick up. The fibers have a great elasticity to them, so it is easy to manipulate the yarn for the cables. That also makes it easy to smooth out the cables by pulling the stitches into line.

I have some quilting to do today, so I won't be getting these socks done this weekend. However, next weekend is Labor Day and I can definitely finish them by the end of a three-day weekend.

I am already thinking of my next project. I have a friend that wants a pair of texting mittens. I can't find a pattern I like for that; so I may have to design something myself.

Happy Knitting!

Monday, August 22, 2011

Heartfelt


I did remember to snap a couple of photos of the latest baby quilt before sending it off to my sister. I got it into the mail this morning. I am going to leave it up to her what to use as a quilting pattern. The border that I put on it is a type of "piano key" pattern -- rather uneven and scrappy looking. It is easy to do and increases the color in a quilt. If you stick to the fabrics that are already in the center motif, it helps tie everything together.

I still  haven't named the quilt. Does anyone have any good names for a heart themed baby quilt?