For the last couple of days, I have been working on my practice blouse. I got all of the muslin pieces cut out and marked using the tracing wheel and waxed tracing paper as I told you in my last post.
Then, using my sewing machine and a dark colored thread, I sewed along the seam lines on each pattern piece to both stabilize the seams (especially on the lower bias pieces) and also give an unfading and tactile seam. This makes it pretty easy to pin the pieces together. You can literally use your fingers to slide the seams together and they "stick" when they are in the right place.
 I then constructed the body pieces, less the sleeves and the collar. Pinning is
 an important detail. It takes a lot of time to pin seams carefully. It is so much faster to throw in only a couple of pins -- or no pins at all -- and fly through the seams. But that is not the way of couture sewing. Couture is a slow, meditative process not a way to knock out an outfit on a Saturday afternoon. (Just today I read an article about how factory workers sew in ready-made clothing faster then home sewers. One reason was not using pins.)
 |
| figure 1 |
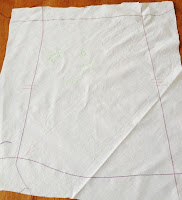
 I read up on how to adjust the bodice of a pattern for a larger bust. And then just followed the directions step by step. I drew my lines onto the pattern with a pink marker (figure 1), cut carefully and spread apart the cut pieces as the book described.
 |
| figure 2 |
 |
| figure 3 |
Next, I get to cut out the four pieces, mark them with the tracing wheel and paper, sew the seam lines in and reconstruct the body. Then we will see if my adjustments fixed the problem.
Happy sewing!


No comments:
Post a Comment