In my last
post, I told you how I bought an entire pound of Bluefaced Leicester ("BFL") roving and that I planned to dye 12 different colors with Kool-Aid. I started with my first two colors last night and then dreamed all night about dying wool and spinning. I was awake early and had my next two colors in the pot by 8 AM this morning. The beauty of using Kool-aid to dye wool is that it is readily available at just about every grocery store in the country.
 |
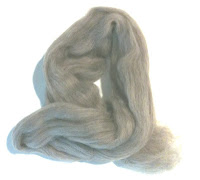
| The un-dyed wool |
I have read several on-line articles and watched some Youtube videos on dying yarn and basically decided to go with the most commonly used process that I saw: Kettle dying. In order to kettle dye, you need a kettle which is basically a cooking pot. Since I am using Kool-Aid which is a food product, I don't have to buy a pot to use specifically for dying; however, if I decide to begin dying on a regular basis and use other types of dye, I will have to buy a separate pot.
The next item that you must have for kettle dying is acid. The acid helps the dye adhere to the protein in the wool. This dye can also be a food grade product like vinegar or citric acid. Again, Kool-aid is great for a first time dyer as it already contains plenty of citric acid so it is not necessary to add more.
Since you will be working with bright colored dyes -- even food grade ones. You may want to use gloves and wear old clothing as blue fingernails take a while to fade. I didn't use gloves but the old clothes came in handy.

Step one in preparation is to soak the roving for at least half an hour to saturate the wool. Just like when you block a finished knitted item, it takes awhile for the water to penetrate the fibers because of the natural lanolin in the wool. Since I was going to dye two colors at a time, I set it up so that I had one bunch of fiber covered in hot water in a bowl weighted down with another bowl with wool and hot water which itself was weighted down with another bowl with just water. The bowls on top kept the wool entirely under water.

While the wool was soaking, I put two pots on the stove with water and set them to boil. When the 30 minute soak is done, I carefully remove the wool and gently squeezed it dry. Wringing the wool could have damaged the fiber. I added 4 packets of Kool-Aid to each pot, using a Kool-Aid
color chart that I found on line.
According to all my sources, the amount of water does not matter at all, it is the ratio of wool fibers to the Kool-aid that matters. I had separated out all of the wool into 35 to 45 gram amounts so all the colors should be even in depth, but I had no idea how bright the colors might be.
I turned off the heat on the stove, boiling could have caused the yarn to felt and that is not what I wanted! Then I added a batch of fiber to each pot. The wool sucks up the color really fast, but leaves the water behind so that after only a few minutes the water goes from colored to near clear. According to the pros, this means the dye is "spent" and the fiber can be removed from the pot. Pour the fabric into a colander and drain out the water. You will want to leave the wool to cool a little and then rinse with hot water. Don't put cold water on really hot wool or you could felt it.

I rolled the fiber into a towel to squeeze the remaining water out and hung the freshly dyed wool in my laundry room. After a long day of dying, my house smells of an odd combination of wet sheep and fruit, but I have lots of lovely colors. I was able to get three gold/wheat colors, 2 purples, 3 greens, 3 reds and a pale blue.The BFL wool started out a grey color with lots of white and black hairs in it. So the colors have lots of depth. When it is all dry, I will try to take a picture outdoors to get better pictures, but on a cold, cloudy day, the laundry room picture will have to do. Can't wait to spin it and knit it.
Happy knitting/spinning/dying.


.JPG)


.JPG)


